
A Step-by-Step Guide to Getting Verified Across ALL Social Media Platforms

Unlocking the Blue Badge: Tips and Tricks for Facebook and Instagram Verification
The elusive blue tick! If you’re going for vanity metrics, it’s the epitome of success on Instagram and Facebook, am I right? We all want it, but HOW do we get it?
Well, if you’re willing to ‘pay’ for the privilege, you’re in luck. BUT, at this stage, it is only available for personal accounts - not business accounts. It’s still being rolled out globally and is currently only available in Australia and New Zealand. Hopefully it won’t be too long before it’s rolled out for Business accounts too. Cost wise, you’re looking at $14.99 USD per month for iOS/Android or $11.99 USD per month on the web (Facebook only). It’s important to note, that for paid verification, you need to do Facebook and Instagram separately (which unfortunately means paying twice, ugh)! Below are some of the benefits of paid verification:
It helps people to know it’s the real you by using government ID to establish authenticity
Proactive account protection to help prevent impersonation
Exclusive features such as exclusive stickers for Stories and reels.
Direct account support from a real person when you need it.
Increased visibility, meaning you can reach more people and have a stronger prominence on social media.
This is the BIG one. Organic reach is VERY hard to obtain nowadays without having to constantly film and product content. To be able to have the ability to pay for ‘organic’ reach with lots of added extras, it should have a positive impact for your overall revenue.
Find full details on paid verification here as well as being able to join the waitlist if it’s not available for you just yet.
However, if you’re wanting to get to FREE verification, keep on reading…
There are three ways to obtain verification.
1. Be selected by the Facebook team. That is, be one of the lucky few who wake up in the morning, check your Instagram or Facebook account and magically have the blue tick.
2. Apply via the app tool in Instagram.
3. Via a Facebook Rep. *This method is the most effective way to obtain verification and what we will explain below.
Now, we’re not saying we can 100% guarantee you’ll get verified using the tricks below, but we have had a great run rate so far – with 14 of the 17 accounts receiving verification after we applied for them in the past six years.
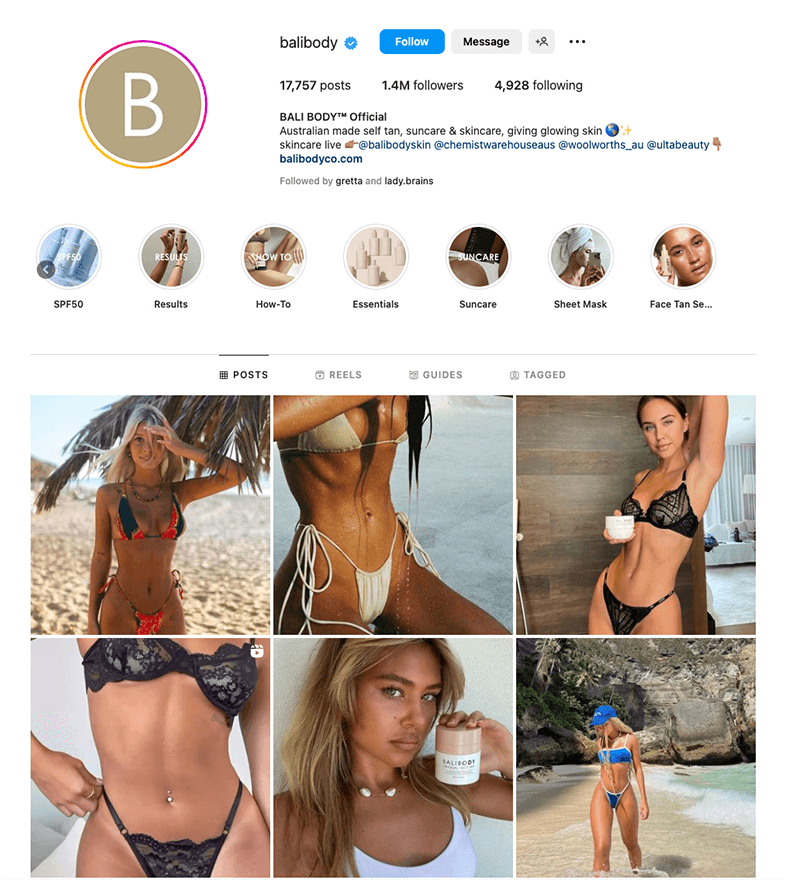
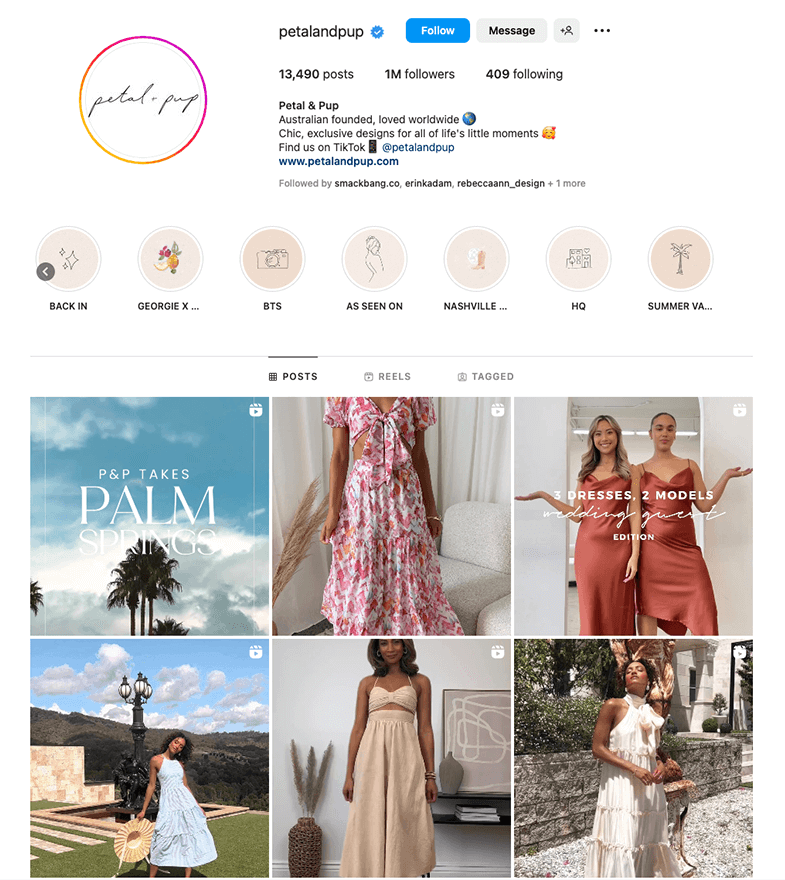
Here are just some of the accounts we have gotten verification for. Please note, one of them had only 1000 followers on Facebook when they became verified!


Here is our method. Unless you meet almost all of the criteria below, it will be unlikely your request for the blue tick will be processed successfully.
· Highlight how much you are spending. Facebook, above everything, is a business.
o The more you spend, the more likely you’ll be to get your verification request across the line. It should be noted here, Facebook is not really looking at your results to determine verification, more how much you are spending on the platform each month.
o Realistically, you need to be spending at LEAST $10,000 AUD a month for Facebook to even give your application a second glance when it comes to verification.
· Are other businesses stealing your content?
o Obtain as many screenshots from different companies stealing your content as possible to show Facebook. It’s important to show how widespread the problem is so the more unique examples from different profiles, the better. Please note, for verification purposes, stealing content is not taking images from your business’s Instagram account and re sharing them with credit. It is accounts taking your content and posting it as if it was their own.
o The goal here is to highlight how confusing it is for potential customers to see your images being used across other accounts and how this is impacting your business and sales.
o If you have any emails/messages from customers questioning other accounts stealing imagery or showing their confusion - screenshot them to send to FB. The more confusion caused, the better.
· Are there accounts impersonating you/your business?
o Is there another Instagram page imitating you? I.E. Using your profile picture, leveraging a very similar handle, copying your photos etc? Take screenshots.
o Trade marks will help here if you have one filed.
· PR (and lots of it)
o Have you had any articles published demonstrating your business growth?
o What about interviews printed?
o Featured on any news programs / podcasts?
o It’s very important to find as many international stories as possible.
o The more PR content you have, the bigger you look as a business. The bigger the business, the more likely you are to be verified.
o Compile everything you have into a clear spreadsheet to make it as easy on the FB employee reviewing your request as possible. - This relates to all points so should add this at the beginning or end?
· Trademarks / copyright documents
o Trademarks prove the validity of your product / business.
· Facebook/IG follower count
o Shows reach of business.
o However, just because you have X followers does not guarantee verification, we have had profiles with 1000 followers verified and 1m+ rejected.
· Currently, only businesses with an account manager at Facebook can request verification
o Everyone would love to have the ‘blue tick’. Facebook typically vetoes businesses without an account manager to avoid anyone and everyone requesting to apply.
o This rule changes often. Over the past three years we have applied via a support channel without needing to involve our account managers. It very much depends on who you receive when reaching out for assistance.
o If you do not have an account manager and the Facebook Support Representative won’t process your request, try again and hope for a different agent.
o Currently, there is no process for advertisers to request a personal Account Manager. If it's determined your account would benefit from additional account management resources, Facebook will reach out to you directly. Keep an eye out for an email!
Pro tip: Your Facebook page will be ALOT easier to get verified than your Instagram account. Start with trying to get your Facebook account verified and then move on to Instagram. If you can tell ad support you already have your Facebook page verified, it provides yet another reason why your IG account should get the ‘blue tick’. In saying this, if you have next to no presence on Facebook compared to your presence on Instagram - simply ask for the blue tick there first.
It sounds simple, but you’d be surprised at how much more likely you’ll be to get verification, if you make the job easy for the Facebook support team. Example email (agency acting on behalf of client):

The Easiest Way To Achieve TikTok Verification
So you are verified on Facebook and Instagram, what’s next? TikTok of course!
TikTok considers a number of factors before granting a verified badge, such as whether your account is authentic, unique, and active. Keep in mind, they don't consider the number of followers or likes on your account as a requirement when granting a verified badge.
Check out the TikTok guidelines below, to see if your brand meets the verification criteria:
Active: Your account must have logged in within the past 6 months.
Authentic: Your account represents a real person, business, or entity.
If you are a business, institution, or entity, your email domain must represent your business during the verification approval process (ex. @tiktok.com).
Complete: Your account must currently be public and have a completed profile with a bio, name, profile photo, and at least one video.
Notable: TikTok reviews accounts that are featured in multiple news sources.
Secure: Your account must have multi-factor authentication with a verified email. This ensures that the authentic owner stays the authentic owner and is protected from malicious actors.
Pro tip: If you already have verification on Facebook and/or Instagram, getting TikTok verification *touch wood* is a much easier process! Outside of proving you are the authentic owner of the account, TikTok really only requires roughly 10 pieces of PR, that were published in the last 2 years. The best part? This can include being verified on other platforms! So if you are verified on Facebook, Instagram and Pinterest, that is already 3 sources!

Once you have your 10 sources ready, you can start your application. If you don’t have a TikTok rep for your business, you can apply through this link. If you DO have a rep, contact them and get them to send through the application form. This is a much more responsive, easier way than submitting personally through the app.
The application can be a bit of a lengthy one, so before you sit down, make sure you have the following information on hand.
Full legal name of the organisation
Full name of account operator - we normally suggest the founders/owners for this
Email address of account operator
Account UID. Instructions below:
Go to your account page.
Click the settings icon in the top-right corner.
Scroll all the way down until you see your app version number at the bottom of the page.
Continuously tap on the version number, and your User ID (UID) will appear. A notification will alert you that the UID has been copied to your clipboard.
It’s as simple as that! Good luck.
A Guide to Verifying Your Pinterest Account
While obtaining Pinterest Verification isn’t as exciting as getting it on Instagram or TikTok, it is BY FAR the easiest platform to receive it. The cute little blue badge on Pinterest, shows that you are a verified merchant. The Verified Merchant program helps people on Pinterest discover and buy from vetted brands. As a verified merchant, your Pins may appear organically to people who are searching for products and shopping on Pinterest.
Before you start your application process, have a read of the following guidelines to ensure you meet the criteria to apply:
Your Pinterest account must be at least three months old.
Your business’s website must have been created at least 13 months ago.
Your Pinterest profile must have a profile picture , and a completed “About” section.
Your products and website must meet our Merchant guidelines criteria. Pinterest will review your website and products once you upload your catalogue. If you do not meet these guidelines, you’ll be notified in the Verified Merchant Program application page where you can also appeal this decision.

Now for the nitty gritty (that isn’t so nitty gritty in this case!).1. Connect your catalog
Get all of your products on Pinterest by connecting your catalog . Once connected, your product Pins will have the most up-to-date price and product information. At least 50% of your products have to be ingested successfully
2. Install the Pinterest tag
Your tag needs to be set up so that it tracks key conversion events and returns high-quality data on shopping-related events. To be included in the Verified Merchant Program, please make sure:
Your tag fires whenever a PageVisit, AddToCart or Checkout event occurs
Your tag fires at least one PageVisit, AddToCart and Checkout event every seven days
Your Checkout events have parsable, positive $ values with valid currency code
Your product IDs sent in each of your tag events match product IDs in your catalog
So, you’ve done all that? Perfect! Apply here.
PS. Pinterest Verification is only available in; Australia, Austria, Brazil, Canada, France, Germany, Italy, Mexico, the Netherlands, Spain, Switzerland, the UK or the US. Our Pinterest rep has advised us that there are other countries in the pipeline. Stay tuned!